You can easily repair a leaking uPVC pipe with a DIY approach to restore your bathroom’s functionality. Leaking uPVC pipes can become a major problem, leading to water wastage. This wastage can damage the house and lead to bigger bills. Thus, knowing how to repair a leaking pipe correctly is crucial, whatever the cause.
Keeping this point in mind, we are going to discuss in detail the complete process of repairing a leaking uPVC pipe, the causes of leaking pipes, and the tools needed to fix them. Thus, with this guide, you will be able to deal with the issue and prevent future leaks.
Causes of leaking uPVC Pipes
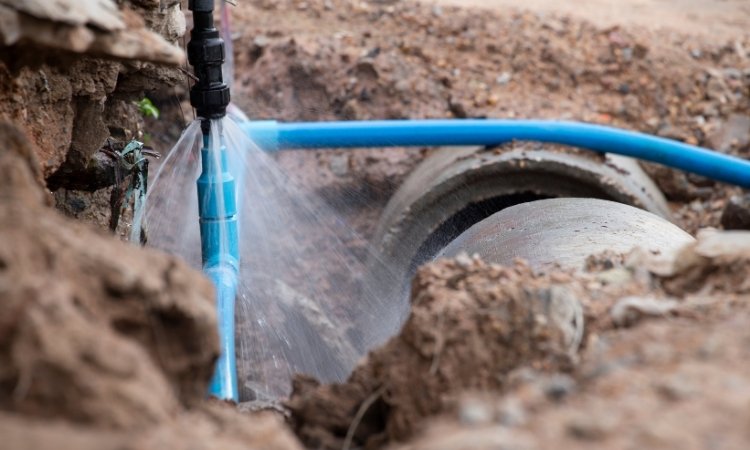
uPVC pipes can start leaking due to many issues. Some common ones include. However, if you are unable to locate the water leak, you may contact LS Plumber Services Singapore to detect a water leak, drain cleaning, and PPR pipe leak and the preventive measures to avoid it in the future.
1. Loose Or Damaged Pipe Joints
Pipe joints are an essential part of the plumbing system. They keep different pipes connected to each other and can suffer wear and tear over long periods of use. This wear leads to joint holes or breakages that can start leaking water. Improperly installed joints are also prone to leaking.
2. Excessive Pressure
Excessive pressure or impact damage on the pipes can lead to breaks. These broken areas can start leaking water due to the breach in the pipe’s structure. Over time, these cracks can enlarge, leading to the waste of large quantities of water.
3. Improper Installation
Improperly installed plumbing systems with weak seals between the pipes can also lead to leaks. The pipes might not be connected properly, or there might be a problem with the plumber’s thread. Whatever the case, hasty or unprofessional installations are a leading cause of water leakages.

4. Damaged Sealant
After long periods of usage, the glue or sealant holding the joints together can suffer damage. Excessive humidity and increased exposure to water lead to breaks in the sealants. Over time, these breaks can enlarge, leading to leaks.
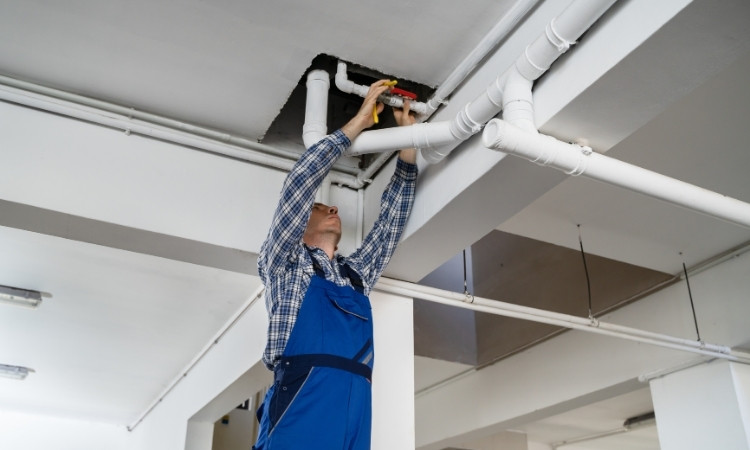
How To Repair A leaking uPVC Pipe
The complete process to repair a leaking uPVC pipe is pretty straightforward. Here are the steps you should follow to fix a leaking uPVC pipe.
1. Identity The leak Source
Before you start the repair process, you must identify the source of the leak. Turn off the water supply to the pipes and wipe the pipe dry. Carefully inspect the pipe to identify loose, broken, or leaking parts or joints. Mark the area with a pencil for easier reference during the repair process.
2. Do The Right Repair
Depending on the type of leak, you will have to use a specific repair method.
Small leaks
- You can use epoxy resin to seal the damaged area for small leaks.
- Clean the area with a dry cloth and smoothen it with sandpaper.
- Knead the epoxy putty and apply it over the leak. Make sure to cover the broken area to get a proper seal.
- Let the putty cure for a short time. Once it sets, it will seal the broken part and prevent leaks.
Leaking Joints
Leaking joints can be fixed with the help of PVC adhesive or PVC cement. To fix a leaking uPVC pipe joint problem,
- Dry and clean the joint and remove any dirt or debris.
- Apply PVC adhesive on both ends of the pipes and reconnect the joints.
- Let the adhesive set for some time before turning the water back on.
Large Cracks Or Broken Parts
Large cracks or broken pipes can’t be fixed with epoxy resins or adhesives. You will have to replace the damaged section.
- Remove the broken piece of the pipe by cutting it out with a hacksaw.
- Sand the edges of the pipes to make them smooth.
- Apply uPVC cement to both ends of the cut pipes and the new fittings.
- Connect the fittings to the pipe ends and keep them together for a few minutes.
3. Test The Repair
The last step in the leaking uPVC pipe repair process is testing the repair to see if it is working fine. Turn the water back on gradually and inspect the repaired areas for any signs of leakage. If needed, apply additional sealant or tape.
Conclusion
We have discussed the complete process to repair a leaking uPVC pipe in Singapore. Leaking pipes are pretty standard in Singapore due to excessive humidity and overuse. Exposure to heat and cold, improper installation, and damaged sealants can lead to leaks. The complete process of repairing the leak is relatively easy and can be done with a DIY approach.
Depending on the type of the issue, you can try various methods such as epoxy resin and plumbing adhesive. You must remove and replace the damaged portion with new fittings for more extensive repairs. However, if the problem is more than you can handle, you can take the help of professionals to repair a leaking uPVC pipe in Singapore.