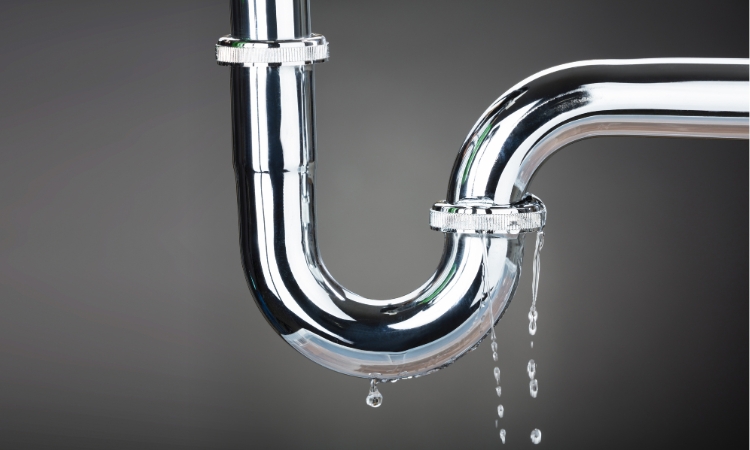
Repair a leaking stainless steel pipe to maintain its endurance and resistance to corrosion. These pipes are sturdy and resistant to moisture, but even these sturdy pipes can develop leaks over time. It can be due to multiple reasons. However, you need a prompt response to rectify the issue and maintain the pipe in pristine condition. This article will explain everything about repairing a leaking stainless steel pipe.
How to Repair a Stainless Steel Pipe?
A damaged or leaky stainless steel pipe can lead to water damage and mold growth if left untreated. Fix a leaking stainless steel pipe as soon as you notice the leak to save yourself from more significant problems. The steel pipe repair process is straightforward, and you can do it without professional assistance. The subsequent section explains a step-by-step process to repair a leaked steel pipe efficiently.
Materials and Tools Needed
Before you begin the stainless steel pipe leak repair, gather the following materials and tools:
- Pipe wrench
- Adjustable wrench
- Pipe cutter or hacksaw
- Emery cloth or sandpaper
- Flux and solder
- Propane torch
- Pipe repair clamp
- Epoxy putty
- Teflon tape
- Safety gloves and goggles
Step-by-Step Guide to Repair a Leak Stainless Steel Pipe
LS Plumber Singapore is a well-known professional in services like sink pipe repair, toilet bathroom leak repair, and kitchen sink repair. It provides the following steps to repair a leaked stainless steel pipe.
Step 1: Identify the Leak
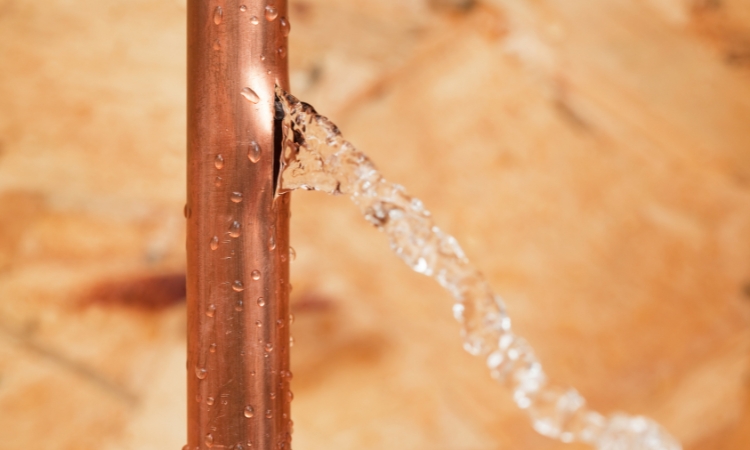
The first step is to identify the exact source of the leak. Sometimes, it can be challenging to trace the leak’s location. This situation arises in a slow drip particularly. Clean the pipe dry and observe it. Look for water beads which will indicate the leak’s location.
Step 2: Turn Off the Water Supply
Once you’ve located the leak, turn off the water supply to the affected pipe. If there is a dedicated valve to control the water flow to that part, close it. If there is no dedicated valve, shut the main water supply valve. This will prevent water from flowing through the pipe during the process.
Step 3: Drain the Pipe
When you turn off the water supply and ensure there is no water flowing in the pipe, open the nearest faucet to the leak to drain any residual water. This step is essential to ensure that the pipe is completely dry before you begin the repair process.
Step 4: Clean the Affected Area
Use a piece of cloth to clean the area around the leak. This will clean the surface for the repair materials to adhere to. Proper cleaning is crucial for the effectiveness of the repair.
Step 5: Apply Epoxy Putty
If you desire a temporary fix, you can use epoxy putty. Cut a small piece of the putty and make it soft and malleable. Use the putty directly over the leak and press it firmly into place. Smooth the edges to ensure a watertight seal. Allow ample time for the putty to cure according to the manufacturer’s instructions.
Step 6: Use a Pipe Repair Clamp
For a long-term solution, a pipe repair clamp is a good option. Place the rubber gasket of the clamp over the leak. Tighten the screws on the clamp to fix it properly. Ensure the clamp is tight enough to stop the leak. However, avoid overtightening, which can damage the pipe.
Step 7: Prepare for a Permanent Fix
If the leak is complicated and large and you want a permanent solution, you should replace the leaking section of the pipe. Use a pipe cutter to remove the damaged section. Try to cut an inch or so beyond the leak on both sides of the pipe to ensure proper working in the future.
Step 8: Fit the New Pipe Section
Bring a new pipe section to replace the damaged one. Clean the ends of the new pipe and the existing pipe thoroughly with a cloth or piece of old towel. Use flux to the ends of the pipes and the inside of the pipe fittings for proper fitting.
Step 9: Solder the New Pipe Section
Place the new section of pipe into the slot and ensure it is secure. Use a propane torch to heat the joint and apply solder to hold it permanently. Take your time and let the joint cool completely before moving to the next step, the water back on.
Step 10: Check for Leaks
Inspect the functionality by turning on the water valve slowly. If there is no leak in the pipe, you have completed the job successfully, and you can turn on the water valve completely. However, clean the pipe surface and check for any other issues around to ensure proper working in the future.
Conclusion
Homeowners can repair a leaking stainless steel pipe to help prevent overbilling and water puddles in the house. There are several methods of repairing a leaky pipe. Some of them are temporary, and some are permanent. The temporary methods are for small leaks or for homeowners who have hired a professional plumber and want to stop water leakage until the plumber arrives. You can select the best possible solution for your scenario.